

Table of Contents
- Understanding Natural Colorants for Cold Process Soap
- Natural Colorants for Cold Process Soap Chart: Ingredient Options and Shades
- How to Add Color to Cold Process Soap Without Clumps
- Non-Fading Natural Soap Colorants: Color Stability Through Cure
- Common Mistakes When Coloring Cold Process Soap
- Troubleshooting Discoloration and Unwanted Effects
- Frequently Asked Questions
Last Updated: October 4, 2026
Understanding Natural Colorants for Cold Process Soap
Natural colorants for cold process soap require a different approach than synthetic dyes. The alkaline environment of saponification can shift, fade, or alter colors dramatically. What looks vibrant in your jar may change completely during cure.
Natural colorants can work beautifully in cold process soap when you understand their behavior, specifically, which ones hold color, which fade, and how to disperse them evenly.
This guide covers everything you need to know about selecting, preparing, and using natural colorants for cold process soap successfully.
Why cold process requires different colorant choices
Cold process soap reaches 120-180°F during saponification, and the alkaline environment (pH 12-13) stresses many natural colorants. Some fade within weeks; others turn muddy or shift unexpectedly. The key challenge is the pH shift during cure, as alkalinity drops, colorants display differently.
How saponification affects color stability
During saponification, many natural colorants break down or shift color. Turmeric turns greenish-brown instead of yellow; activated charcoal can gray out; clays lighten as pH drops. Understanding this chemistry helps you choose colorants that survive the process and explains why day-one color differs from week-four color.
Natural Colorants for Cold Process Soap Chart: Ingredient Options and Shades
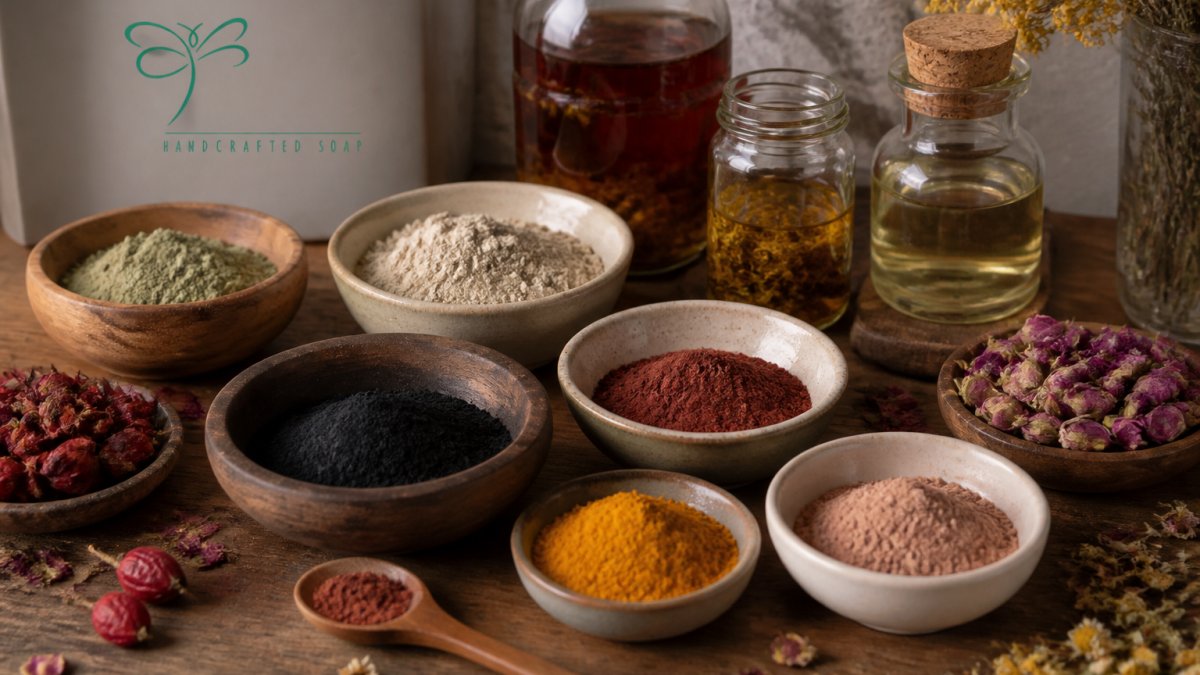
Natural colorants for cold process soap fall into four main categories. Each behaves differently in the batter and produces distinct results.
Clays and mineral colorants
Clays are the most reliable natural colorants for cold process soap, they disperse easily, don't fade significantly, and add skincare benefits.
Kaolin clay produces white to pale cream (1-2 tsp/lb). French green clay creates soft sage tones, shifting slightly toward gray (1-1.5 tsp/lb). Bentonite clay yields pale gray to taupe (1 tsp/lb). Dead Sea mud produces warm gray-brown, stable through cure (1-1.5 tsp/lb). Iron oxides are mineral pigments, more concentrated than clays (1/4-1/2 tsp/lb).
Disperse clays in distilled water or glycerin before adding to batter to prevent clumping and ensure even distribution.
Botanical powders and plant-based colors
Turmeric powder creates golden yellow but shifts toward olive green over 4-6 weeks (1-2 tsp/lb). Annatto seed produces warm yellow-orange, more stable as an oil infusion (1-2 tsp/lb). Cocoa powder yields rich brown, stable if not over-concentrated (1-1.5 tsp/lb). Carrot powder creates soft orange-peach, more stable than juice (1-2 tsp/lb). Beetroot powder produces pink-mauve but fades noticeably over 4-8 weeks (1-2 tsp/lb). Madder root creates warm rust-terracotta, more stable as oil infusion (1-1.5 tsp/lb). Indigo produces stable blue-purple, requires special preparation (1/2-1 tsp/lb). Green tea powder yields soft sage-green, relatively stable (1-1.5 tsp/lb). Chamomile powder creates pale yellow-cream, subtle and stable (1-2 tsp/lb).
Disperse botanical powders in water, glycerin, or oil first to prevent clumping.
Activated charcoal for deep tones
Activated charcoal creates stable deep blacks and dark grays. Use sparingly, start with 1/4 teaspoon per pound of oils, as too much creates grittiness. Disperse in water or glycerin as a smooth paste before adding to batter. It adds no scent and pairs beautifully with any fragrance oil.
Oil infusions for extracting plant color
Oil infusions extract color more effectively than powders, creating richer, more stable colors. Steep dried botanicals in carrier oil for 1-2 weeks, then strain. Madder root (2-4 weeks) produces rich rust-terracotta. Annatto yields warm yellow-orange with excellent stability. Turmeric creates golden yellow with less green shift than powder. Indigo requires a water paste, added separately. Use 1-2 tablespoons of infused oil per pound of base oils.
How to Add Color to Cold Process Soap Without Clumps
Adding colorants directly to the batter creates clumps and uneven color distribution. Proper dispersal prevents this and ensures smooth, evenly colored soap.
Dispersing colorants before adding to batter
For clays and powders: Measure colorant into a container, add 1-3 tablespoons of distilled water, glycerin, or carrier oil per teaspoon of colorant, and whisk into a smooth paste. Mix for 1-2 minutes to ensure complete dispersion, then add to batter at trace. Glycerin works best as it mixes easily with both oils and water-based colorants.
For oil infusions: Add as part of your base oils before mixing with lye water, no additional preparation needed. For indigo: Mix powder with water to create a paste, let sit 15-30 minutes to hydrate, then add at trace.
Timing: when to add colorants at trace
Add colorants at light to medium trace, when batter falls from the stick blender in ribbons that sit on the surface for 2-3 seconds. At this point, the batter is thick enough to hold colorant suspended but still fluid enough to blend throughout. Blend your dispersed colorant for 30-60 seconds to ensure even distribution. For multiple colors, add each at light to medium trace and blend briefly before pouring.
Dosage guidelines for natural colorants
How much colorant you use affects both color intensity and soap texture. Too little produces pale shades. Too much can affect lather or create grittiness.
| Colorant Type | Dosage per Pound of Oils | Color Intensity | Texture Impact |
|---|---|---|---|
| Kaolin clay | 1-2 teaspoons | Light to medium | None |
| French green clay | 1-1.5 teaspoons | Light to medium | None |
| Activated charcoal | 1/4-1/2 teaspoon | Medium to dark | Slight grittiness if over 1/2 tsp |
| Turmeric powder | 1-2 teaspoons | Light to medium | None |
| Cocoa powder | 1-1.5 teaspoons | Medium | None |
| Madder root (powder) | 1-1.5 teaspoons | Light to medium | None |
| Oil infusions | 1-2 tablespoons | Medium to dark | None |
| Iron oxide | 1/4-1/2 teaspoon | Medium to dark | None |
Start with the lower end of the range and increase in future batches if you want more intense color. This prevents over-coloring and texture problems.
Remember that colors appear darker and more vibrant in wet batter than in finished soap. Expect colors to lighten slightly as the soap cures and dries.
Non-Fading Natural Soap Colorants: Color Stability Through Cure
Not all natural colorants behave the same way during cure. Some remain stable. Others fade or shift dramatically over weeks.
Which colorants fade and which hold strong
Most stable: Activated charcoal (black remains black), clays (kaolin, French green, bentonite, may lighten slightly), indigo (stable once prepared), and iron oxides (mineral-based, extremely stable). Moderately stable: Madder root and annatto (shift slightly but remain recognizable), cocoa powder, and green tea powder. Unstable: Turmeric (golden yellow becomes olive green or mustard), beetroot powder (fades from pink to brown over 4-8 weeks), and carrot juice (fades within 2-3 weeks; powder is more stable).
Testing color results during cure
Test colorants in small batches (1-2 lbs) before committing to large batches. Document color immediately after pouring, at 24 hours, one week, and four weeks (full cure). Compare photos to see exactly how much the color shifts and when. Keep notes on colorant type, amount, dispersal method, batter temperature, and final cured color for future reference.
Common Mistakes When Coloring Cold Process Soap
Most colorant problems stem from a few repeated mistakes. Avoiding these saves batches and produces better results.
Adding colorant too early causes separation and uneven color. The batter isn't thick enough to hold the colorant suspended. Result: streaks, spots, or settled color at the bottom.
Adding colorant directly to the batter without dispersing creates clumps. Powder particles clump together and don't blend smoothly. You see specks or uneven patches in the finished soap.
Using too much colorant darkens the color but can affect lather or create grittiness. More isn't always better. Start small and increase gradually.
Forgetting to account for color shift leads to disappointment. You plan a golden yellow soap and it turns olive green. Testing prevents this surprise.
Using unstable colorants without knowing it results in fading soap. Turmeric and beetroot fade significantly. If you love these colors, use them knowing they'll change.
Not documenting your process means you can't repeat successful batches. Write down everything: colorant type, amount, dispersal method, timing, temperature, and final results.
Skipping the dispersal step is the most common mistake. Colorants need liquid carriers to break apart and distribute evenly. This one step eliminates most problems.
Troubleshooting Discoloration and Unwanted Effects
Even with proper technique, unexpected color issues happen. Here's how to address them.
Soap is blotchy or streaky:
Cause: Colorant wasn't dispersed evenly or was added before trace.
Fix: Next batch, disperse colorant thoroughly in a liquid carrier.
Color is much darker than expected:
Cause: Too much colorant was used, or the colorant is more concentrated than anticipated.
Fix: Use less colorant in the next batch. Start with half the amount and increase gradually. Remember that wet batter appears darker than cured soap.
Soap has speckles or gritty texture:
Cause: Colorant particles weren't fully dispersed, or activated charcoal was used in excess.
Fix: Disperse colorant more thoroughly. For charcoal, reduce the amount to 1/4 teaspoon per pound of oils or less.
Color shifted unexpectedly during cure:
Cause: The colorant is sensitive to pH change or alkaline conditions.
Fix: Use a different colorant for future batches. If you love the shifting color, document it and use it intentionally for ombre or color-shift effects.
Fragrance oil separated from colored batter:
Cause: Some colorants, particularly activated charcoal, absorb fragrance oils.
Fix: Use slightly more fragrance oil when coloring with charcoal. Increase by 10-15% and test.
Color faded significantly during cure:
Cause: You used an unstable colorant like turmeric or beetroot.
Fix: Switch to more stable colorants like clays, activated charcoal, or madder root.
Coloring cold process soap naturally requires understanding how colorants behave in an alkaline, heat-generating environment.
At Minerva Rae, we craft handcrafted soaps using natural colorants that maintain their beauty through the full cure cycle.
Frequently Asked Questions
How much natural colorant should I use in cold process soap?
Most natural colorants work best at 0.5 to 1.5 teaspoons per pound of oils, though some (like activated charcoal or indigo) require less due to their intensity. Start with 0.5 teaspoon per pound, test in a small batch, and adjust upward if needed. Botanical powders and clays can go up to 2 teaspoons per pound without affecting lather or texture. Always disperse your colorant in a small amount of distilled water or oil before adding to soap batter to avoid clumps.
Which natural colorants hold their color in cold process soap?
Activated charcoal, iron oxide-free clays (kaolin, French green, Dead Sea mud), and indigo are among the most stable through cure and aging. Turmeric, annatto, and carrot produce reliable yellows and oranges but may fade slightly over months. Botanical powders like green tea and rose hips offer subtle, earthy tones that remain fairly consistent. Plant-based reds and purples (madder root, cocoa) tend to shift or fade more noticeably, so test them in small batches first to see how they perform in your specific formulation.
Can I use food coloring to color cold process soap?
Food coloring is water-based and will not mix properly into the oil-based soap batter, resulting in separation and uneven color. Soap-grade colorants, clays, and botanical powders are formulated to disperse in oils and withstand the saponification process. If you want vibrant colors, use soap colorants, mica, or natural powders designed for cold-process soapmaking instead.
What causes discoloration or color fading in handmade cold process soap?
Discoloration often results from oxidation, improper dispersal of colorants, or incompatibility between ingredients and the alkaline environment created during saponification. Some natural colorants fade when exposed to light or air over time. To minimize fading, store finished bars in a cool, dark place away from direct sunlight. Test colorants in small batches before committing to a full pour, and always disperse them properly to avoid streaking or uneven color development during cure.