

Table of Contents
- Why Handmade Soap Dissolves Faster Than Commercial Bars
- Step 1: Choose the Best Soap Dish for Handmade Soap
- Step 2: Master Proper Soap Storage Techniques
- Step 3: How to Cure Handmade Soap Properly
- Step 4: Dry Your Soap Between Uses
- Why Does Handmade Soap Get Soft in the Shower
- Conclusion
Last Updated: August 17, 2026
Why Handmade Soap Dissolves Faster Than Commercial Bars
Handmade soap dissolves more quickly than mass-produced alternatives because of fundamental differences in formulation. Commercial soaps contain hardening agents, preservatives, and synthetic binders that extend shelf life. Artisanal bars rely on natural oils and minimal additives, making them softer, more absorbent, and more vulnerable to water exposure.
This isn't a flaw, it's a trade-off. Those same properties that make artisanal bars dissolve faster also make them gentler on skin and richer in glycerin, which commercial manufacturers often extract for profit. The real problem isn't the soap itself, but storage and maintenance. A well-made handmade bar can last as long as a commercial one with proper care.
Step 1: Choose the Best Soap Dish for Handmade Soap
The soap dish you choose matters significantly. A poor choice can cut your soap's lifespan in half. The best soap dish combines three essential features: drainage, air circulation, and material compatibility.
Drainage and Material Matter Most
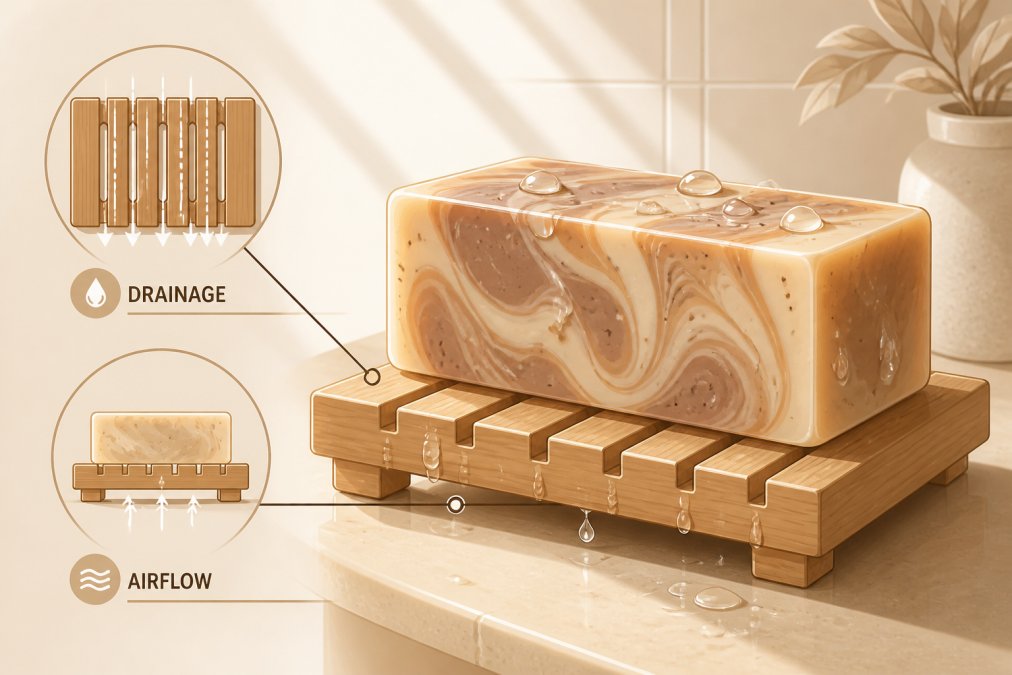
Drainage is non-negotiable. Water pooling beneath your soap accelerates disintegration. Look for soap dishes with sloped surfaces or raised edges that direct water away from the bar. Silicone soap dishes with drainage holes are excellent, affordable, durable, and genuinely functional.
Material selection is equally critical. Porous materials like ceramic and wood absorb water and trap moisture against the soap. Nonporous materials like silicone, stainless steel, or glazed ceramic are more forgiving and won't keep your bar damp longer than necessary. Avoid solid soap dishes without drainage holes, they're essentially soap traps that hold water.
Soap Saver Bags and Accessories
Soap saver bags solve a different problem. These mesh or cotton bags let water flow through while containing soap scraps and exfoliating your skin. They're particularly useful as your bar gets smaller, preventing waste and extending the life of soap remnants.
Some people use soap saver bags as their primary storage method, hanging them to air-dry between showers. This approach works exceptionally well because it maximizes air circulation, the soap never sits in standing water. Wooden soap racks designed for artisanal bars feature slats that allow water to drain and air to circulate underneath, making them worth the investment if you're serious about soap longevity.
Step 2: Master Proper Soap Storage Techniques
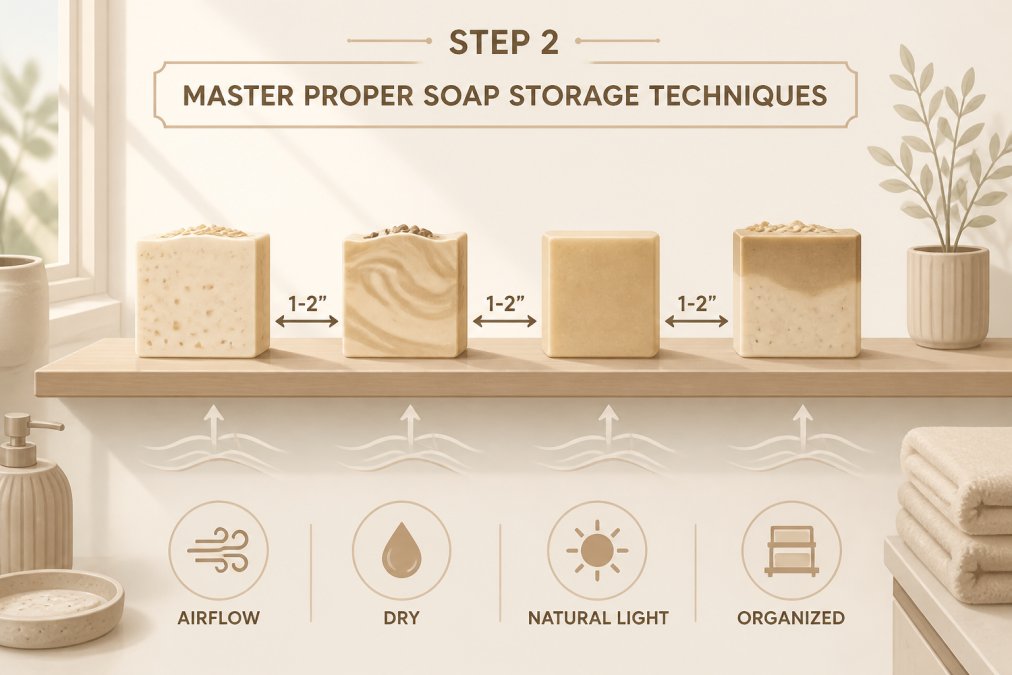
How you store your soap between uses determines whether it stays firm or turns into mush. Storage involves the entire environment surrounding your bar.
Air Circulation and Room Temperature
Air circulation is your most powerful tool for preventing handmade soap from dissolving. Stagnant, humid bathrooms are death traps for artisanal soap. Run the exhaust fan during and for 20-30 minutes after your shower to remove moisture and allow your soap to dry properly.
Room temperature matters more than expected. Soap softens as temperature increases. Keeping your bathroom cool and avoiding direct sunlight or heat sources like radiators extends soap life significantly. Place your soap dish where it gets air flow, the edge of a sink near a window or bathroom fan is ideal, not the corner of a shower where water collects.
Humidity Control
Humidity is the invisible enemy. High moisture in the air prevents your soap from drying out, regardless of drainage quality. If your bathroom regularly feels damp or steamy, humidity is working against you.
A simple dehumidifier can transform your bathroom environment. Running one for an hour after showers makes a measurable difference. Ensure your bathroom exhaust fan functions properly and use it consistently. If you see condensation on mirrors and walls regularly, your bathroom is too humid for optimal soap storage.
Step 3: How to Cure Handmade Soap Properly
Curing is something you should understand as a user. A properly cured bar is significantly harder and more resistant to water than a freshly made one.
Curing Time and Saponification
Saponification is the chemical reaction that transforms oils and lye into soap. This process continues for weeks after the soap maker pours it into molds, gradually hardening the bar. Most handmade soap needs 4-6 weeks of curing time to reach optimal hardness.
If you buy handmade soap cured for the full recommended time, you're getting a superior product. Ask your soap maker about curing time. During curing, soap loses water content through evaporation, which makes the bar harder. Storing soap in a humid environment or airtight container after purchase reverses this process by reintroducing moisture.
Oil Profiles and Hardness
Different oils create soaps with different hardness levels. Coconut oil and palm oil create harder bars. Olive oil and castor oil create softer, more conditioning bars. The best handmade soaps balance hard oils and soft oils to create durability with skin benefits.
Hard oils contribute stearic acid and other fatty acids that create a firm bar resistant to water. Soft oils contribute emollient properties that make the soap luxurious but more prone to dissolving. Understanding this helps you make informed choices about which soaps suit your needs.
Step 4: Dry Your Soap Between Uses
This is the single most actionable step you can take to prevent handmade soap from dissolving. After each use, remove your soap from the shower or sink and place it somewhere it can dry completely before the next use.
Don't leave your soap sitting in a wet dish. Remove it immediately and set it on a separate, dry surface where air can reach all sides. A small towel, washcloth, or dedicated drying rack works perfectly.
If you shower daily, rotate between two or more bars of soap. While one is drying, you use another. This gives each bar 24 hours or more to dry completely, mimicking the curing process and hardening the bar.
Pat your soap dry with a clean cloth if it's dripping wet. This takes 30 seconds and removes significant surface moisture.
Why Does Handmade Soap Get Soft in the Shower
Handmade soap gets soft in the shower because of direct water exposure and the hygroscopic nature of glycerin. Understanding this mechanism helps you understand why certain storage and drying practices work.
Water Chemistry and Soap Sweating
Water itself dissolves soap, that's the entire point of using it to clean. Hard water, which contains minerals like calcium and magnesium, can actually help soap last longer by creating a protective film on the surface.
Soap sweating is a phenomenon where glycerin absorbs moisture from humid air, creating a wet film on the surface. This isn't a sign of poor quality; it's actually a sign that your soap contains real glycerin, which is beneficial for skin. If you notice soap sweating, your bathroom humidity is too high. Address this through better ventilation or by moving the soap to a drier location.
Glycerin Content and Moisture Absorption
Glycerin is a humectant, meaning it draws moisture from the environment. This is why handmade soaps feel more luxurious and moisturizing than commercial bars, they contain significantly more glycerin. But this same property makes them more vulnerable to moisture absorption.
Commercial soap manufacturers often extract glycerin and sell it separately, making their bars harder but less moisturizing. Handmade soap makers leave the glycerin in, creating a superior product for your skin but one that requires more careful storage.
Handmade soap dissolves faster than commercial alternatives not because of poor quality, but because of superior ingredients and formulation. The glycerin, natural oils, and minimal additives that make artisanal soap better for your skin also make it more vulnerable to moisture. The solution is to implement the storage, drying, and environmental practices outlined above.
The best soap dish for handmade soap combines drainage and air circulation. Proper curing time ensures your bar reaches optimal hardness before use. Consistent drying between uses removes the moisture that causes dissolution. Together, these practices extend the life of your soap dramatically.
Minerva Rae's handcrafted soaps are formulated and cured to deliver longevity alongside luxury. When you combine our intentionally designed bars with the storage and care practices in this guide, you get a product that lasts, performs beautifully, and elevates your daily routine. Explore the Collection to discover soaps engineered for both indulgence and durability.
Frequently Asked Questions
What makes handmade soap dissolve faster than commercial bar soap?
Handmade soaps contain higher glycerin content and fewer synthetic hardeners than mass-produced bars, making them more absorbent and prone to water exposure. The saponification process in artisanal soaps creates a more porous structure that naturally absorbs moisture. Additionally, handmade soaps lack the preservatives and stabilizers found in drugstore brands. Proper curing time, drainage, and storage directly impact how long your bar lasts.
How long should I cure handmade soap before using it?
Most handmade soaps require 4-6 weeks of curing time to complete saponification and allow excess moisture to evaporate. During this period, the soap hardens significantly and becomes less prone to disintegration. Cold process soaps typically need the full 6 weeks, while melt and pour varieties may cure faster. Proper curing dramatically extends shelf life and improves how the soap performs in the shower.
What's the best soap dish for handmade soap?
A wooden soap deck or ceramic dish with drainage holes is ideal for handmade soap. These materials allow water to drip away rather than pooling. Silicone soap dishes work well too if they have raised ridges for drainage. Avoid solid, non-porous dishes that trap water underneath. The key is ensuring air circulation around the bar, elevated designs with gaps prevent the soap from sitting in moisture.
Why does my handmade soap get soft in the shower?
Water chemistry, humidity, and glycerin content all contribute to soap softening. Handmade soaps naturally contain glycerin, which attracts moisture from the air and water stream. Hard oils like stearic acid and coconut oil help, but they can't fully prevent water absorption during use. Storing your soap on a draining dish between showers and keeping your bathroom well-ventilated minimizes softening. Using a soap saver bag during showers also reduces direct water exposure.
This article was written using GrandRanker